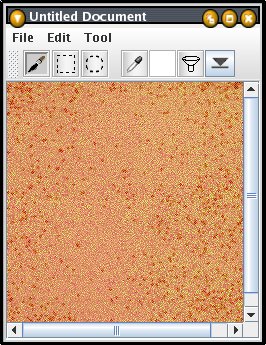
17. As you can see, this adds some nice richness to the texture:
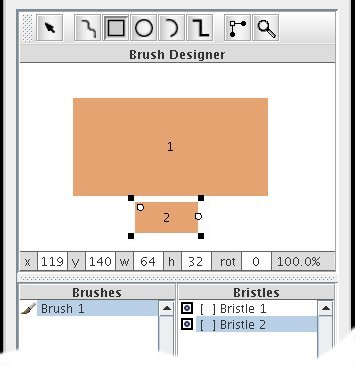
18. Next, we'll add a bristle to paint the mortar. First, add a third layer by right-clicking in the Layer Manager layer list, and selecting the New Layer option. Back in the Brush Designer, we'll add a second bristle, again by drawing it with the Rectangle tool:
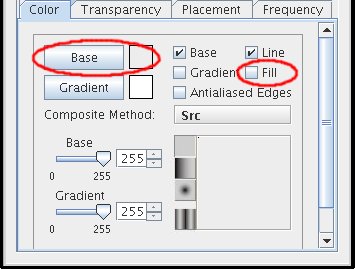
19. Since it inherited all of the attributes associated with the bristle we used for the primary fill, we'll need to make a few changes. First up, are a few of the color attributes. Activate the Color tab, click on the Base button, and enter 0, 0, and 93 for the H, S, and V values in the color picker dialog. Then make sure that the Fill option is inactive.