Tutorial- How to create a brick texture
- 9
23. Not bad, but we can give the mortar a more "dirty" appearance by applying the Sharpen filter 2-3 times (right-click on the canvas and choose Filter->Sharpen):

24. We're nearing the homestretch...all we need this point is to apply an offset so that every other row is staggered. This will require two steps using the Offset Image filter.

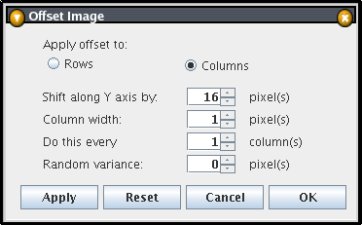
25. In the first step, we'll need to shift the entire layer upward so that the mortar rests along the image border. When layers are shifted using this filter, anything that is shifted "off the canvas" is wrapped around to the opposite side. For this particular operation, we'll shift each column in the layer down by 16 pixels: